ReachMail enables automatic DKIM signing and provides easy setup for custom domains, enhancing email deliverability.
Authentication Video Tutorial
DKIM stands for DomainKeys Identified Mail. DKIM adds a digital signature to your emails that verifies an email was sent from an authorized sender and hasn’t been altered in transit.
Manually setting up DKIM requires editing your domain's DNS records. If you're not comfortable making these changes, you can use Entri to automatically configure your DNS.
To get started:
- Go to your Account tab
- Select Campaign Setting
- Click on Domain Authentication.
- On this page, enter your domain and subdomain (if applicable).
- Afterward, click the Add Domain button to proceed.

Authentication Setup Overview
After adding a domain, ReachMail provides setup instructions for:
-
SPF (left section)
-
DKIM (middle section)
-
DMARC (right section)
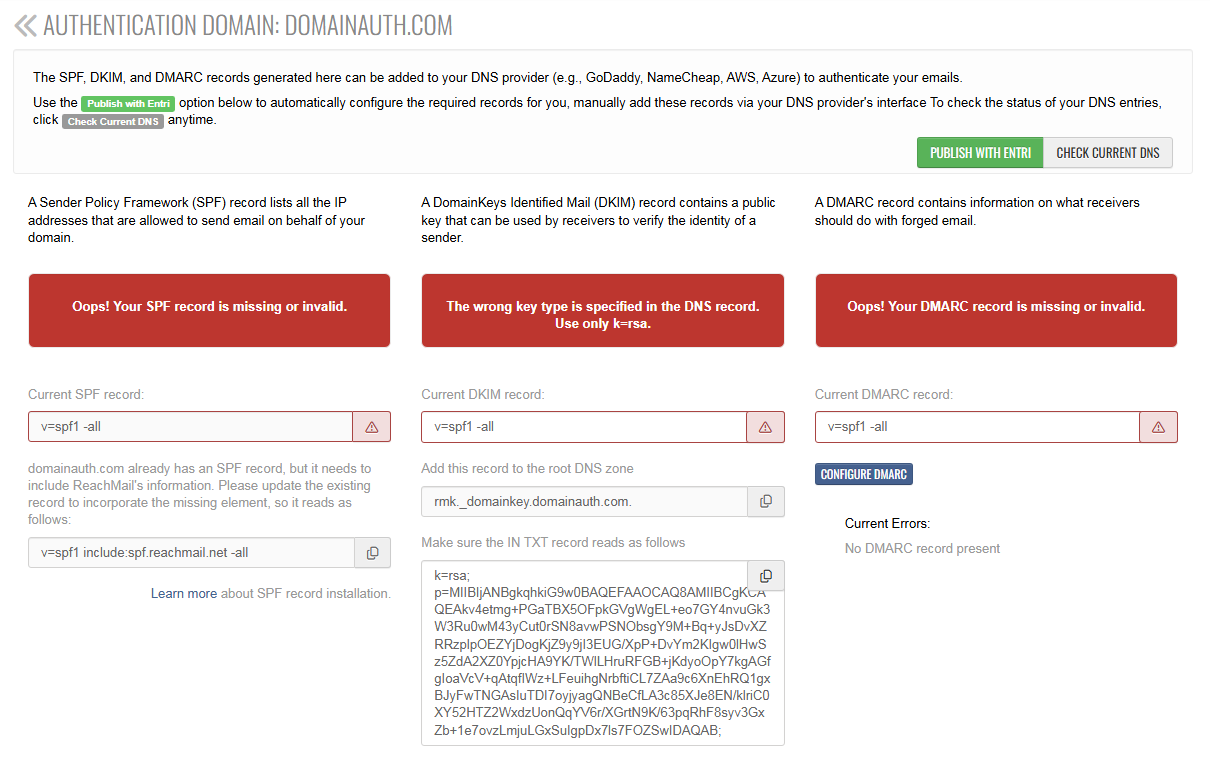
DKIM Setup Details
In the DKIM section:
-
Top box:
- Displays your current DKIM status
- Updates periodically
-
Middle box:
- Contains the DNS record to add to your root domain
-
Bottom section:
- Provides the DKIM key for the TXT record
- Use the copy button (on the right) to easily copy values
After Updating DNS
- Wait at least 10 minutes for DNS changes to propagate
- Click Check Current DNS to refresh the status manually
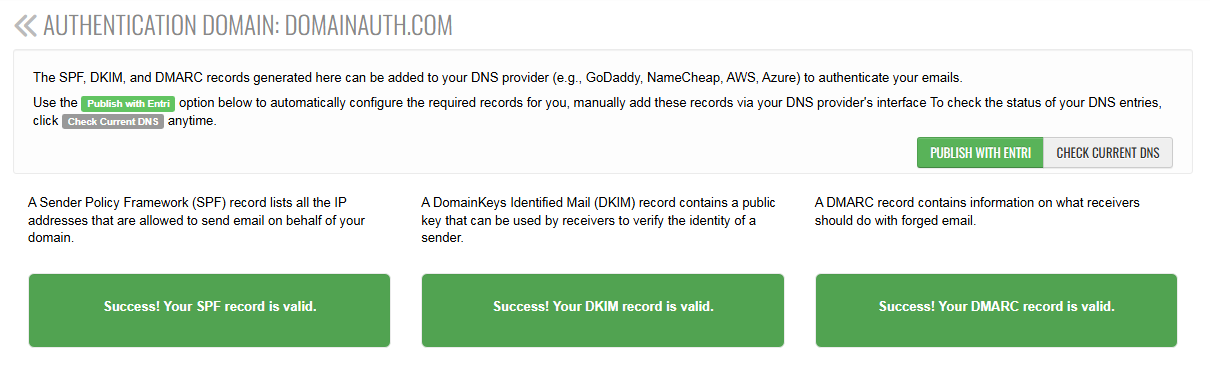
Verification Results
- ✅ Green message = Setup successful
- ❌ If not successful:
- Double-check DNS entries
- Ensure changes have fully propagated
ReachMail recommends that customers implement DKIM, SPF, and DMARC for best results.