Domain authentication ensures that emails sent from your domain are verified and trusted by recipients and email providers. This process helps improve deliverability and prevent spoofing. For more information on DKIM, SPF, and DMARC, please refer to this comprehensive support documentation.
To get started:
- Go to your Account tab
- Select Campaign Settings
- Click on Domain Authentication
- On this page, enter your domain and subdomain (if applicable).
- Afterward, click the Add Domain button to proceed.

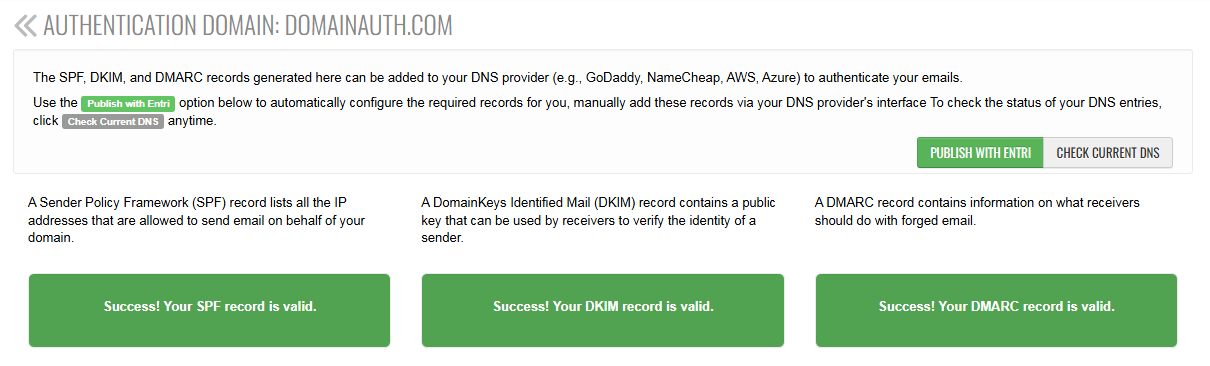
- After adding your domain, our system will provide instructions for setting up DKIM, SPF, and DMARC. The SPF record will be displayed on the left, DKIM setup instructions will appear in the middle, and DMARC information will be shown on the right.

You have two options for updating your DNS records:
-
Manually Publish: Manually update your DNS records with the information provided for DKIM, SPF, and DMARC. Requires some advanced technical knowledge.
-
Publish With Entri: Automatically update your DNS records by logging into your DNS provider through Entri. This option simplifies the process and ensures accuracy.
After making the necessary changes, allow at least 10 minutes for the DNS updates to propagate. To check your records:
- Click the Check Current DNS button to refresh the status manually.
- If the setup is correct, you’ll see green success messages confirming a successful installation.
- If not, verify that your DNS entries are accurate and fully propagated before trying again.